
Buyer's guide
Luxury vinyl plank installation, step by step
Click-lock LVP is the most forgiving floor a first-timer can attempt. Three quarters of a vinyl plank flooring installation is preparation, and almost every floor that fails does so for one of six reasons, all of them avoidable.
Vinyl plank flooring installation, step by step
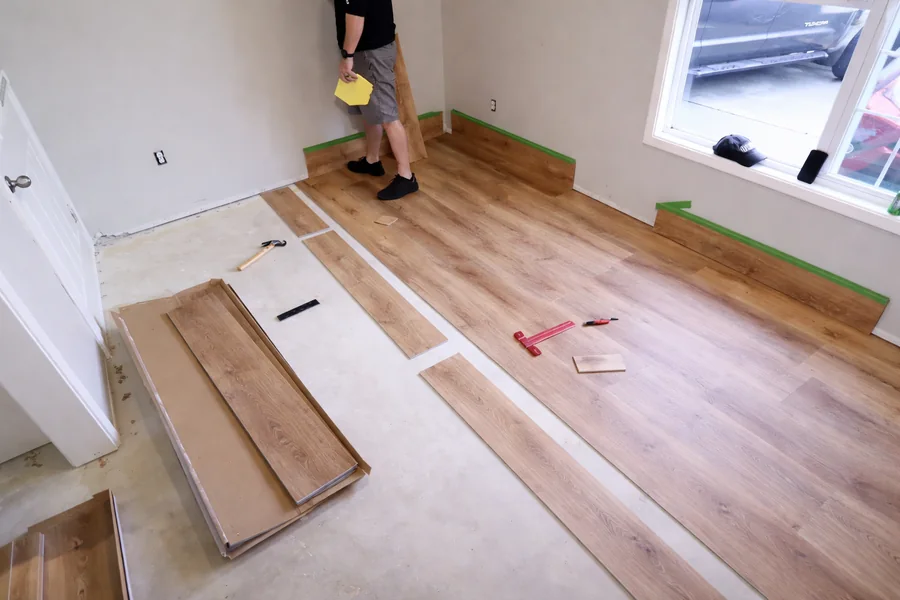
Flatness matters more than anything else on this list. The standard most manufacturers write into their warranty is 3/16 inch over 10 feet. Lay a straight edge across the floor and look for daylight under it. High spots get ground down, low spots get filled with levelling compound. Rigid core plank bridges small dips better than a flexible glue-down, but nothing bridges a hollow — you will hear it underfoot as a click for the life of the floor.
Stack the boxes flat in the room where they will be installed and leave them 48 hours. Not on edge, not stacked six high in a hot garage. In Florida the case that actually bites is a house that has been closed up with the air conditioning off — install into that and the planks tighten up as soon as the AC runs. Get the room to its normal lived-in temperature first.
Decide the run direction, then measure the room and work out how wide the last row lands. If it comes out under about 2 inches, trim the first row down so the first and last rows are closer in width. A thin sliver at the far wall is the single most common thing that makes a competent installation look amateur.
A quarter inch around every fixed vertical — walls, cabinet toes, door jambs, pipe collars, kitchen islands. Vinyl moves with temperature, and a floating floor with nowhere to move will lift into a ridge somewhere in the middle. Spacers along the starting wall keep the gap honest while you work.
End joints in adjacent rows want at least 6 inches between them, and 8 to 12 inches looks better. Cut the offcut from the end of one row and start the next row with it, provided it is longer than 6 inches. That both randomises the pattern and keeps waste down.
Score and snap handles almost every cut: run a utility knife along a straight edge on the face, then flex the plank and it breaks clean. No dust, no saw. Use a jigsaw for pipe collars and door casings, and undercut the casings with a flush saw so the plank slides underneath rather than being scribed around.
The expansion gap gets covered, never filled. Quarter round or base shoe at the walls, a T-mould where the floor meets another floor of the same height, a reducer where it meets something lower, and stair nose on any step. Fasten trim to the wall, never through the floor — a single nail through a floating floor pins it and undoes the whole expansion plan.
What an LVP flooring installation actually takes
Click-lock luxury vinyl plank is the most forgiving floor a first-timer can attempt. There is no adhesive open time to race, no nailer to hire, and most cuts are made with a utility knife. A capable DIYer does a 12 × 15 bedroom in a day, and a whole floor of a house over a long weekend.
The work is roughly a quarter laying plank and three quarters preparation. Almost every failed floor we hear about traces back to subfloor prep, acclimation or a missing expansion gap — never to someone clicking the planks together wrong.
Tools
- Utility knife and plenty of spare blades — this makes most cuts
- Tape measure, pencil and a long straight edge or chalk line
- Spacers for the expansion gap, or scrap cut to a quarter inch
- Tapping block and pull bar for closing end joints
- Rubber mallet
- Jigsaw or multi-tool for pipe collars and door casings
- Flush-cut saw for undercutting door casings
No wet saw and no flooring nailer. If you are installing a glue-down instead, add a notched trowel and the adhesive the manufacturer specifies.
Do you need underlayment under vinyl plank flooring?
Usually not, and adding it can void the warranty. Most modern rigid core plank ships with a pad already bonded to the back — 77 of the 77 floors we stock have an attached IXPE pad — and stacking a second pad underneath makes the floor spongy enough that the locking joints flex and eventually fail. Manufacturers are specific about this because it is a common and expensive mistake.
Check the back of a plank before buying anything. If there is a foam or felt layer bonded to it, that is your underlayment and the job is done.
When you do add something
- Bare plank with no attached pad. A thin foam underlayment rated for rigid core, and only if the manufacturer allows it.
- Concrete slab. A 6 mil polyethylene vapour barrier, even when the plank has a pad. Slabs pass moisture upward, and this is the one addition that is nearly always correct in Florida.
- Sound control in a condo. Many associations require a rated underlayment. Check the bylaws before you buy — that requirement overrides everything else here.
What underlayment does not do is fix a bad subfloor. It is a few millimetres of foam. It will not level a dip, and laying it over one hides the problem without solving it.
Floating or glue-down?
A floating floor is not fastened to the subfloor at all. The planks lock to each other and the whole field moves as one sheet, which is why the expansion gap matters so much. A glue-down is bonded to the subfloor with adhesive and does not move.
| Floating click-lock | Glue-down | |
|---|---|---|
| Difficulty | DIY-friendly | Best left to a professional |
| Subfloor tolerance | Bridges minor dips | Telegraphs every flaw |
| Underfoot | Slight give, hollower sound | Solid, quiet |
| Repairs | Lift and replace a plank | Adhesive has to be cut out |
| Rolling loads | Can shift under heavy traffic | Better for commercial |
| Time to walk on | Immediately | Wait for cure |
For a home, floating is almost always the right answer, and it is what every floor in our catalogue is designed for. Glue-down earns its place in large open commercial spans, under rolling loads, or where the height of a floating assembly will not clear an appliance.
Which direction should the planks run?
Three rules, in order of priority when they conflict.
- Follow the light. Run planks parallel to the main window wall so light travels along the seams rather than across them. Raking light across a seam is what makes every joint visible.
- Run the long dimension. In a rectangular room, lay planks along the length. It makes the room read longer and cuts the number of end joints.
- Keep it continuous. Run the same direction through every connected room. Changing direction at a doorway needs a T-mould and chops the floor into boxes, which makes a house feel smaller.
On a wood subfloor there is one hard constraint that outranks all three: planks must run perpendicular to the floor joists, or the floor will flex along the joist lines. On concrete you are free to choose.
When the light and the long dimension disagree, in an open plan take the long dimension and in a single bright room take the light.
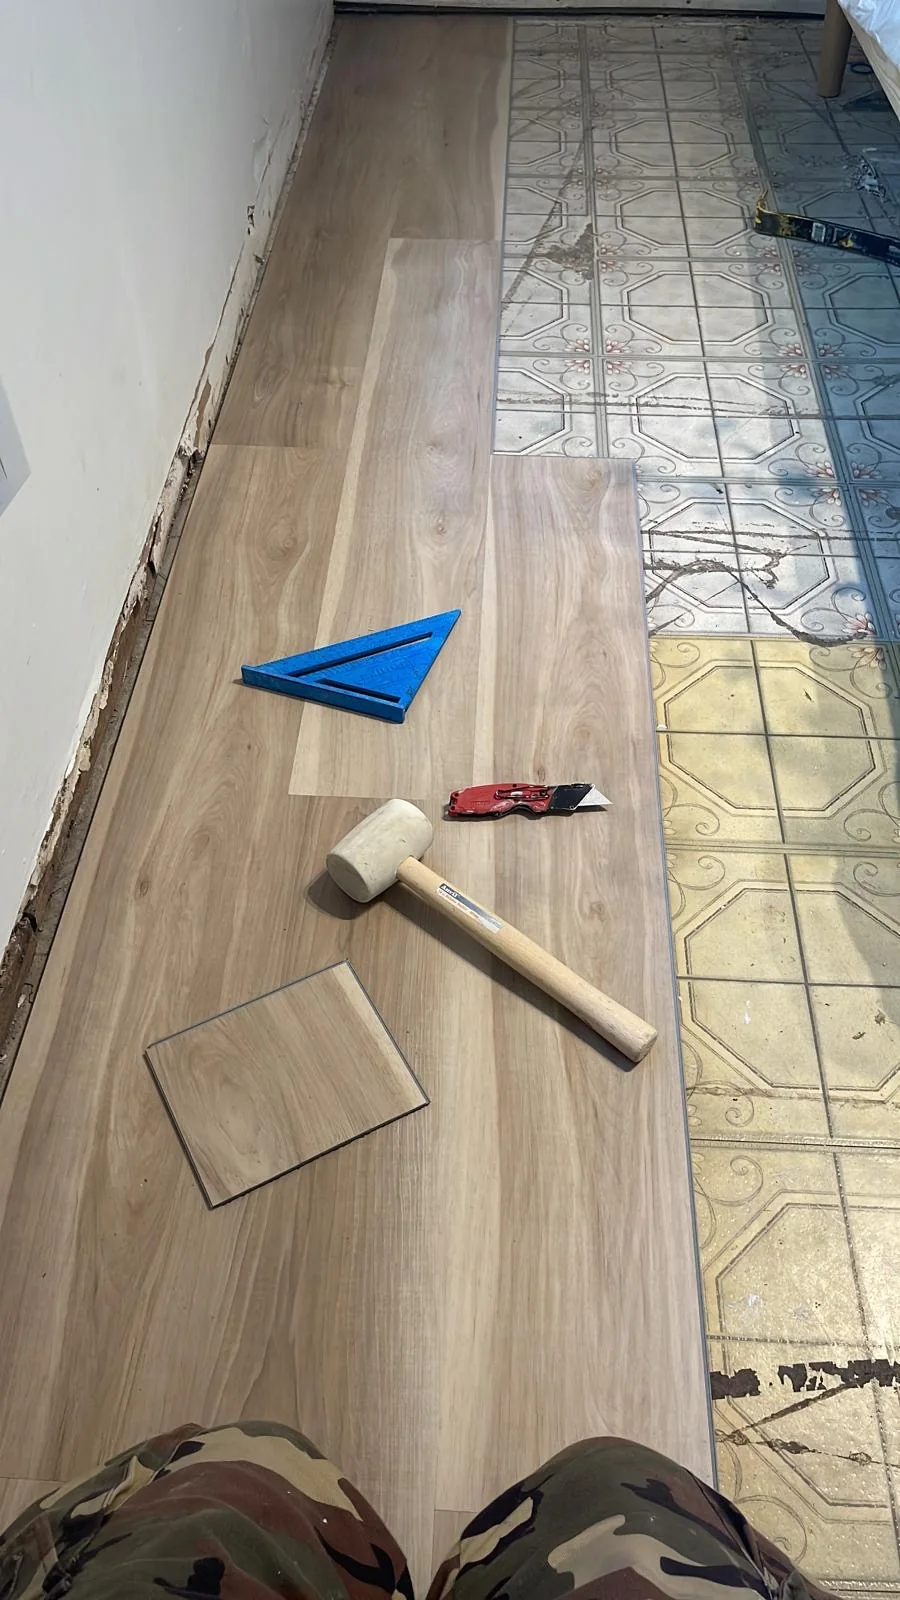
Tile is the common Florida case, and it does not have to come up. Fill the grout lines flat, check for hollow tiles, and account for the height at doorways. There is a whole guide on it: installing LVP over tile.
How to stagger the seams
Staggering is what separates a floor that looks laid from one that looks manufactured. The goal is end joints that never line up and never form a visible diagonal.
- Minimum 6 inches between end joints in adjacent rows. Eight to twelve is better and most manufacturers specify at least six.
- Avoid the H joint — an end joint in row three sitting directly above one in row one. Keep three rows apart.
- Avoid the staircase — offsetting every row by the same amount produces a diagonal stripe that the eye picks out instantly. Vary the offset.
- Start rows from the offcut of the previous row when it is over 6 inches. Random by construction, and it is the main lever on waste.
- Work from several boxes at once. Planks are printed in a limited number of patterns, and pulling from three or four open boxes stops the same grain repeating in a cluster.
A useful habit is to dry-lay three or four rows before clicking anything down, step back, and look at the joint pattern from the doorway. Problems that are invisible on your knees are obvious from eight feet away.
Cutting, transitions and the last row
Cuts
Score and snap for straight cuts: utility knife along a straight edge on the decorative face, then flex. Jigsaw for curves and pipe collars — drill the collar hole oversize, cut a wedge out to slide the plank in, then glue the wedge back and cover it with a pipe collar ring. Undercut door casings with a flush saw rather than scribing the plank.
Transitions
Every floor we stock has matching trims because a transition in a near-enough colour is worse than an obvious one. Across the catalogue 77 floors have a matching T-mould, 77 a reducer and 77 a stair nose.
- T-mould — meeting another floor of the same height, or a doorway where the run direction changes
- Reducer — meeting something lower, like a slab or vinyl sheet
- Stair nose — any step edge
- End cap — where the floor stops at a slider or hearth
The last row
The final row almost always needs ripping down the length. Measure at both ends of each plank rather than assuming the wall is parallel, because it usually is not. Score and snap the rip, then pull it tight with the pull bar, remembering the quarter inch gap. If the last row is coming out under 2 inches, that was decided when you cut the first row.
The mistakes that cause callbacks
- Skipping acclimation. Boxes go in the room for 48 hours, at the temperature the room will actually be lived at.
- No expansion gap, or a gap that is filled. Caulking the perimeter is the same as having no gap. It gets covered by trim, not filled.
- Trim nailed through the floor. Quarter round fastens to the wall. One nail into the plank pins the whole floating field.
- A second underlayment under a padded plank. Voids most warranties and makes the locking joints flex.
- Ignoring the subfloor. More failures come from this than everything else combined.
- Ordering exactly the square footage. Add 10 % for waste and keep a box back — a plank damaged in year three is unreplaceable once a run is discontinued.
Our boxes cover between 18.8 and 30.2 sq ft, so the flooring calculator rounds your rooms up to whole boxes of a real floor and adds the waste allowance for you.
Common questions
Run the planks parallel to the wall with the main window so light travels along the seams instead of across them, and along the long dimension of the room. On a wood subfloor, planks must run perpendicular to the joists, and that rule beats both of the others. Keep the same direction through every connected room.
Usually not. Most rigid core plank has a pad bonded to the back — 77 of the 77 floors we stock have an attached IXPE pad — and adding a second pad makes the floor spongy enough to stress the locking joints, which voids most warranties. The exception is a concrete slab, where a 6 mil vapour barrier is still worth adding, and condos whose bylaws require a sound-rated underlayment.
At least 6 inches between end joints in adjacent rows, and 8 to 12 inches looks better. Avoid joints lining up within three rows, and vary the offset row to row so the pattern does not form a visible diagonal. Starting each row with the offcut from the last is the easiest way to keep it random and cut waste at the same time.
A capable DIYer covers a 12 by 15 foot bedroom in a day and a whole floor over a long weekend. Add 48 hours before any of that for the boxes to acclimate. Subfloor preparation, not laying plank, is what actually decides the timeline.
Click-lock LVP is the most DIY-friendly floor there is. Most cuts are made by scoring with a utility knife and snapping, there is no adhesive to race and no specialist tool to hire. The difficulty is in flattening the subfloor and planning the first row, not in the planks themselves.
Yes, provided the tile is sound and flat. Grout lines wider than about a quarter inch should be filled with levelling compound first, or they will telegraph through. Loose or hollow tiles have to come out. Remember the extra height at doorways and appliances.
Yes, on any floating floor. A quarter inch around every wall, cabinet toe, door jamb and pipe. Vinyl expands and contracts with temperature, and with nowhere to go it lifts into a ridge. The gap is covered by trim — never caulked or filled.
No. Run a floating floor up to the cabinet toe kick with the expansion gap, not underneath. Cabinets weigh enough to pin the floor in place, which stops it moving as a sheet and buckles it elsewhere. It also means the floor can be replaced later without pulling the kitchen out.
Ten per cent over the measured area for a simple rectangular room, and 15 for a room with lots of cuts or a diagonal layout. Keep a spare box after the job, because a run can be discontinued long before you damage a plank.
Read next
Floors that fit this advice
Order $4.99 samples → · Work out how much you need · browse all 77 floors
We deliver here